
Make Rice Koji in 12 effortless steps
Are you looking for a fresh culinary project? Try your hand at rice koji!
Follow these steps from two renowned chefs to prepare delicious rice koji at home.
Below is an excerpt Which Alchemy By Jeremy Umansky and Affluent Shih. It has been adapted for employ on the Internet.
Preparing basic rice koji in the established way
Let’s go through the basic stages of making koji from rice – both established methods and those that have worked in our case.
1. Get the right rice
Koji prefers starch amylose, which is found in higher concentrations in long grain rice. There are three main varieties of rice grains: brief, medium and long. Generally, long grain varieties contain a higher ratio of amylose to amylopectin, while brief grain varieties are the opposite and contain a higher ratio of amylopectin to amylose.
Although brown rice contains a higher density of micro- and macronutrients than koji, it is mainly reserved for savory applications such as amino pastes. The best universal substrate is long-grain white rice. We love the koji we get from jasmine rice.
This doesn’t mean you should only employ jasmine rice; it’s just what we generally prefer. You may also prefer organic rice over non-organic rice. Simply put, choose rice based on what is significant to you and the results you want to achieve.
2. Wash the rice
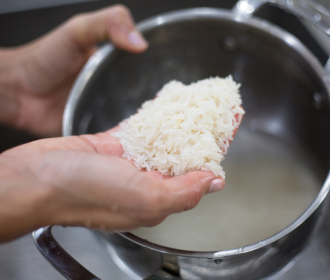 This is to wash away the starch left on the rice after it has been ground. During the milling process of white rice, the husk, bran layer and germ are removed. After doing this, a significant amount of powdered starch remains on the grains. The presence of excess starch is very apparent if you place your hand on a pile of raw grains. When you take your hand off it will be dusty and chalky.
Starch residues can cause rice to stick together and clump during cooking, which is not conducive to growing powerful koji sake, for example, because it requires adequate air access. For this reason, you need to wash the rice under icy running water until the water is crystal clear and no longer murky with free starch.
The washing process may take 30 minutes or longer, depending on the variety of rice and the cleanliness required. This is the most significant factor influencing the basic taste of sake. However, for most other applications, washing does not have to be so thorough – you can even skip it altogether.
3. Soak the rice
Rice should be soaked at ambient temperature for at least 6 hours. This is done to partially hydrate the rice so that proper gelatinization of the grains can be achieved during steaming. This is an significant step you can’t miss it.
4. Steam the rice
Traditionally, steaming was done in a bamboo steamer placed over a pot of boiling water. First, line the steamer basket with a lint-free cloth to prevent the rice from falling through the wooden slats. Then drain the rice from the soaking liquid and place it in the basket. Fill other steamer baskets of the same size accordingly and place them on top. Place the lid on the basket and let the rice steam for 45 to 75 minutes.
The goal is to cook the rice to such an extent that the pasta can be considered ready (al dente). The Japanese concept of gaikou-nainan covers the moment when the surface of cooked rice is demanding and the inside is supple. This forces the mold to focus on growing into the rice, not just the surface.
5. Nippy the rice
Spread the rice evenly over a vast surface and air it occasionally to nippy it down. For those of us who make smaller batches, hotel/baking pans work well. Generally speaking, any food-safe pan or tray that will fit in your incubator will do the job. An evenly filled tray should contain a layer of grain no more than 11⁄2 inches (3.8 cm) high.
Koji will begin to die if exposed to temperatures above 115°F (46°C) and will die completely at temperatures around 130°F (54°C). It prefers a temperature range of 70°F (21°C) to 95°F (35°C). The cooling process helps dissipate excess moisture and allows the gelatinized starch in the rice to bind. Koji makers can tell if the rice is icy enough by simply touching it. You can also employ an true probe or infrared thermometer.
6. Inoculate the rice
Koji spores were traditionally applied using compact, hand-held bamboo shakers, similar to salt shakers. The koji maker sprinkled the rice with spores in such a way that an evenly dispersed cloud fell on the rice.
On a compact scale, we have found that spooning the amount needed onto a compact spoon and tapping it lightly as you move it across the bed of rice works well. We employ a ratio of 1 gram (0.04 ounce) of spores per 1 kilogram (2 lb) of rice.
7. Mix rice and spores
Gently mix the rice and spores by hand so that the spores are evenly dispersed and cover as much of the rice as possible. You want to do this so that the rice grains don’t get crushed and broken, or crushed into gigantic sticky lumps. Koji needs exposure to atmospheric oxygen; if the grains stick together, no koji will be able to grow. Mixing thoroughly for a few minutes is enough to disperse the spores.
8. Mound Koji and grow rice
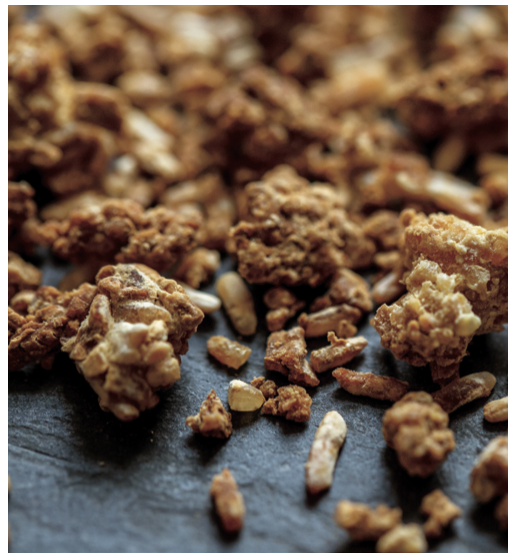
Koji with caramelized jasmine rice. Photo: Andrew Wang.
Traditionally, the inoculated rice is placed in a vast pile on a tarp, covered and set aside for at least 6 hours. In your case, Leaving the rice evenly distributed on a tray for 12 hours works well. How you coat the rice depends on the incubator you employ. (These details are described in Step 10, “Put the Koji”).
9. Mix the rice
After the first rest, stir the rice. During the cultivation process, it performs three functions: It aerates the rice, cools it and stimulates vigorous mycelium growth. As the koji grows, it produces heat. The heat can fluctuate so wildly that it rises above 130°F (54°C), killing the koji before it can fully develop a mat of mycelium.
Without this step, the koji would not develop and would then spoil and decompose. When stirring the koji, the mycelium breaks into smaller pieces, which in turn grow more voraciously. In some ways this is similar to the reasons for pruning fruit trees.
10. Place Koji on the tray
Place the inoculated mixed rice on square or rectangular trays made of Japanese cedar wood and lined with a lint-free cloth. Instead of spreading it into a flat layer, shape the rice into numerous ridges or mounds that rise and fall above the surface. These ridges may be linear and parallel, or they may be arranged in a circular pattern.
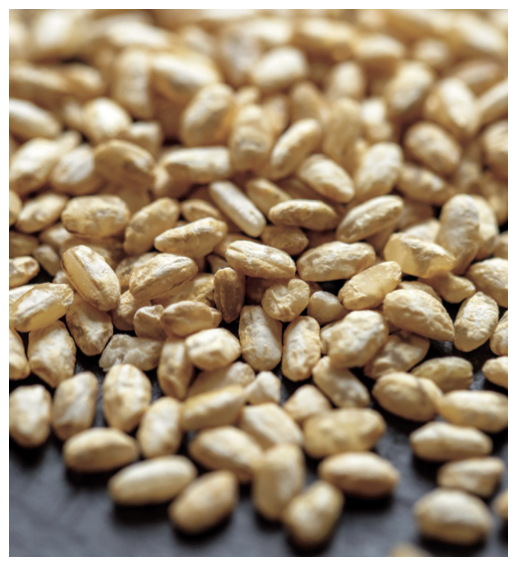
South River Miso Dried Brown Rice Koji. Photo: Andrew Wang.
This step is an art, meditative in the same way as a thoughtful zen garden. However, in this respect it is also practical these ridges and mounds augment the surface area of the rice and expose more grains to the air. The trays are covered with a lint-free cloth to support maintain high humidity, then stacked and left to rest. These clothes are called tenugui in Japanese and are made of very finely woven cotton fabric. They do not fray easily and do not leave fibers that can stick to the bunk. You can easily find lint-free cotton cloths in many stores.
11. Stir and rest, stir and rest
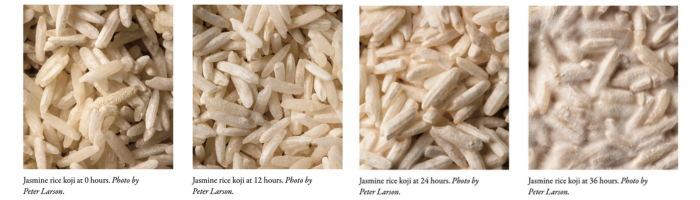
The stirring and resting cycle is performed several times until the koji is fully bloomed and embedded deep into each grain of rice. You can break apart the rice grains to see how deep the mycelial hyphae have penetrated. (The closer to the center of the fibers, the better.) We discovered it just mix and whip every 12 hours until you reach 48.
12. Perform a final Koji check
Carry out a final inspection of koji rice. Aromatic and visual cues will tell you exactly when to harvest the koji and employ it as needed. The koji will become extremely odorous and will have an aroma that many people describe as a blend of fresh mushrooms, chestnuts, honeysuckle, champagne and tropical fruits. The main visual cue is the stark white, fluffy mat of mycelium that has completely and tightly bound the rice grains together.
Once these two tips become obvious to you, the koji will be ready. From start to finish, the entire process takes on average 2 to 4 days.
Recommended reading
The post Make Koji Rice in 12 Effortless Steps first appeared on Chelsea Green Publishing.