
Soil Testing: Well soil is only a test
Testing the soil in your garden is the first step to a more plentiful harvest. It’s not as arduous as it may seem – just take a compact sample, test it, and you’ll be well on your way to fit soil and a promising harvest this season.
Below is an excerpt The Regenerative Grower’s Guide to Garden Improvements By Nigel Palmer. It has been adapted for utilize on the Internet.
Soil Testing: The Basics
An crucial first step is to find a testing laboratory that will test for all the micro and trace minerals of interest. Soil testing does not need to be done every year, so it is a wise investment, especially if no information is available about the mineral content of the soil.
To assess the content of minerals in the soil, a laboratory employee rinses samples with a faint acid solution. The acid solution simulates the faint acids produced by soil biology to break down minerals (rock particles). This test allows you to assess the availability of minerals in the soil.
Soil testing methods
Acids of various strengths are used to wash the soil, and the names of the tests are used to differentiate the strength of the acid used. A test known as the Mehlich 3 test provides a reasonable measurement of the plant-available mineral content of the soil.
Recently, a testing method called the Haney soil test has become popular. Discussing these test methods with a specific laboratory will shed delicate on which one will be best in your specific situation.
The laboratory should offer detailed guidance on how to conduct a soil test and the nature of its analysis. Look for this information on the testing lab’s website.
Once you have selected a lab, it is a good idea to utilize it over an extended period of time to reduce sources of variability in results when comparing results year to year.
Soil Testing: When to Test
 Another way to reduce variability is to collect soil samples for testing at the same time every year. It is worth noting that the proportions of minerals in the soil change throughout the year, with autumn being the lowest level of mineral content in the soil.
This is a attractive concept to consider because it brings to delicate the power of soil biology during the icy winter months and early spring working to digest available minerals for next year’s plants. Yes, the soil’s digestive system works even in the dead of winter.
Conducting a soil test in the fall captures this lowest point in the mineral availability cycle and is a time of year when other gardening activities may have ceased.
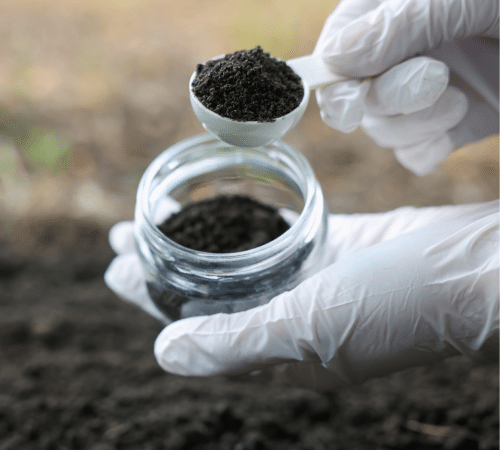
Taking a soil sample for testing
Generally, samples should be taken from the top 15 cm of soil, which (theoretically) corresponds to the depth of the root zone of many crops. This 6-inch depth is also crucial when calculating rework needs. You can buy a special device that collects perfect “cores” of soil.
Another basic way to collect a sample is to utilize a trowel.
Before digging, make sure the tools used for collecting, mixing and packing are pristine and free from rust or other contaminants.
Scrape any plants or other debris from the soil surface and dig a hole just over 6 inches deep. Remove a sample about 2 inches (5 cm) broad from the side of the hole and cut it into a length of about 6 inches. Please ensure that the sample does not contain any material other than soil.
Collect several samples from different places in the garden this way. A general rule is to collect five or six samples in a 50 by 50 foot (15 × 15 m) area. The goal is to determine the overall average characteristics of garden soil.
Then mix all individual samples thoroughly in a pristine bucket. Once mixing is complete, remove 1 to 2 cups of soil from this bucket.
This averages out to the top 6 inches of soil in the garden. Pack it up and send it to the lab for analysis. And remember that even more detailed sample collection instructions should be available from the testing laboratory.
Soil test: results
The results of your first soil test may be depressing, but there is nothing to fear.
Even in a recent garden that has some soil deficiencies, a crop of freshly harvested produce will still be richer in nutrients and flavor than store-bought produce that was harvested long ago and transported hundreds or thousands of miles.
It is also crucial to remember that many mineral deficiencies in the soil may take more than a year to correct. This may take several years.
The same can be true for excesses – it may take several years for levels to reduce to optimal levels. The crucial thing is that objective information is now available to enable the development of both long- and short-term change strategies. Imagine how good these tomatoes will taste next year!